All Classes Namespaces Functions Variables Typedefs Enumerations Enumerator Friends Pages
PostProcessingExample.cpp

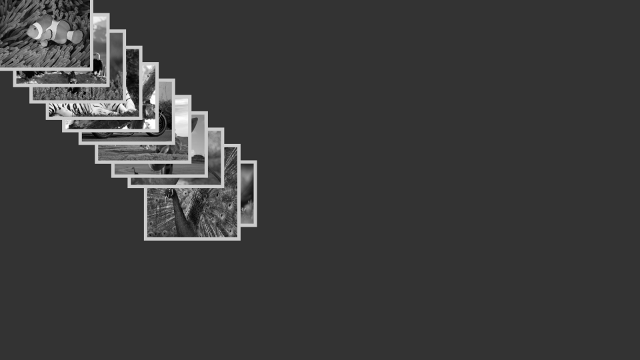
This example will demonstrate how to use the post-processing framework of Cornerstone. The post-processing framework is used to render the application to an auxiliary buffer (instead of the normal back buffer) and then filtered with image processing techniques to achieve different post-processing effects. This example shows one such effect where the application is slowly faded to black-and-white when idle and then animated back to full-color when one of the widgets is touched.

PostProcessing-screenshot.png
Screenshot of the PostProcessing example

The post-processing framework functions with a set of post-process filters that form an ordered chain. When using post-processing the application is rendered using each filter in the chain sequentially. The original scene is rendered using the first filter and the result of that filtering is used as a source image for the next filter and so on. After the last filter the image is rendered to the back buffer and shown on the screen.

A custom filter can be implemented by deriving from the base class Luminous::PostProcessFilter and using a custom shader to perform the filtering. For this example we create a class called BlackWhiteFilter that derives from Luminous::PostProcessFilter and overrides the filter function. Shown here is the header file containing the class declaration:

/* Copyright (C) 2007-2013 Multi Touch Oy, Finland, http://www.multitaction.com
*
* This file is part of MultiTouch Cornerstone.
*
* All rights reserved. You may use this file only for purposes for which you
* have a specific, written permission from Multi Touch Oy.
*
*/
#ifndef BLACKWHITEFILTER_HPP
#define BLACKWHITEFILTER_HPP
#include <Luminous/PostProcessContext.hpp>
#include <Luminous/Program.hpp>
#include <Luminous/Style.hpp>
#include <Radiant/TimeStamp.hpp>
#include <Valuable/AttributeFloat.hpp>
namespace Examples
{
class BlackWhiteFilter : public Luminous::PostProcessFilter
{
public:
BlackWhiteFilter();
Luminous::Style style) const OVERRIDE;
void eventProcess(const QByteArray & messageId,
Radiant::BinaryData & data) OVERRIDE;
private:
Valuable::AttributeFloat m_fadeOutTime;
// Custom shader that does the filtering
// Stores the timestamp for interaction
Radiant::TimeStamp m_timeStamp;
};
}
#endif // BLACKWHITEFILTER_HPP

The implementation of the class can be seen below:

/* Copyright (C) 2007-2013 Multi Touch Oy, Finland, http://www.multitaction.com
*
* This file is part of MultiTouch Cornerstone.
*
* All rights reserved. You may use this file only for purposes for which you
* have a specific, written permission from Multi Touch Oy.
*
*/
#include "BlackWhiteFilter.hpp"
namespace Examples
{
BlackWhiteFilter::BlackWhiteFilter()
: m_fadeOutTime(this, "fade-out-time", 5.f)
, m_fadeInTime(this, "fade-in-time", 1.5f)
, m_timeStamp(Radiant::TimeStamp::currentTime()) // Set the timestamp as current time
{
eventAddIn("reset");
// Load the vertex and fragment shaders from disk
m_shader.loadShader("bw-filter.vs", Luminous::Shader::Vertex);
m_shader.loadShader("bw-filter.fs", Luminous::Shader::Fragment);
// Create a vertex description with position and texture coordinates
desc.addAttribute<Nimble::Vector2f>("vertex_position");
desc.addAttribute<Nimble::Vector2>("vertex_uv");
m_shader.setVertexDescription(desc);
}
void BlackWhiteFilter::filter(Luminous::RenderContext & rc,
Luminous::Style style) const
{
// Time difference relative to timestamp. This value will decline in time
// until we reach m_timeStamp (where diff = 0) and then start increasing
const float diff = std::abs(m_timeStamp.sinceSecondsD());
// Ratio of time difference from timestamp and the specified fadeout time
const float t = diff / m_fadeOutTime;
// Set the style to use our custom shader and set the t uniform
style.setFillProgram(m_shader);
style.setFillShaderUniform("time", t);
// Call the base implementation to perform the filtering
PostProcessFilter::filter(rc, ctx, style);
}
void BlackWhiteFilter::eventProcess(const QByteArray & messageId,
{
if(messageId == "reset") {
// Set the timestamp for when the filter should reach full color
Radiant::TimeStamp::createSeconds(m_fadeInTime.asFloat());
} else {
// Process default messages
PostProcessFilter::eventProcess(messageId, data);
}
}
}

The most important part of the filtering is the custom shader. The custom shader can be used to read the captured source image and to output filtered pixel values. The basic procedure for loading a custom shader is to load it from the disk and specifying the vertex description, shown below:

// Load the vertex and fragment shaders from disk
m_shader.loadShader("bw-filter.vs", Luminous::Shader::Vertex);
m_shader.loadShader("bw-filter.fs", Luminous::Shader::Fragment);
// Create a vertex description with position and texture coordinates
desc.addAttribute<Nimble::Vector2f>("vertex_position");
desc.addAttribute<Nimble::Vector2>("vertex_uv");
m_shader.setVertexDescription(desc);

Custom shaders are described in more detail in the AdvancedRendering example. For reference both the vertex and fragment shaders are shown below. The vertex shader only performs the basic transformations while the fragment shader contain most of the relevant code for this example.

The vertex shader:

#version 150
layout(std140, column_major) uniform BaseBlock
{
mat4 projMatrix;
mat4 modelMatrix;
vec4 color;
float depth;
};
in vec2 vertex_position;
in vec2 vertex_uv;
out vec2 fs_vertex_uv;
void main()
{
fs_vertex_uv = vertex_uv;
gl_Position = projMatrix * modelMatrix * vec4(vertex_position, depth, 1);
gl_Position.z = depth * gl_Position.w;
}

And the fragment shader:

#version 150
layout(std140, column_major) uniform BaseBlock
{
mat4 projMatrix;
mat4 modelMatrix;
vec4 color;
float depth;
};
uniform sampler2D tex;
uniform float time;
in vec2 fs_vertex_uv;
out vec4 frag_color;
void main()
{
vec4 real_color = color * texture(tex, fs_vertex_uv);
float luma = dot(real_color.rgb, vec3(.2126, .7152, .0722));
// Use luma as color
vec4 luma_color = vec4(luma, luma, luma, real_color.a);
float t = clamp(time, 0.0, 1.0);
frag_color = mix(real_color, luma_color, t);
}

In the C++ code the we need to pass the texture and uniform values that govern the behaviour of the shader. These are done in the filter function:

void BlackWhiteFilter::filter(Luminous::RenderContext & rc,
Luminous::Style style) const
{
// Time difference relative to timestamp. This value will decline in time
// until we reach m_timeStamp (where diff = 0) and then start increasing
const float diff = std::abs(m_timeStamp.sinceSecondsD());
// Ratio of time difference from timestamp and the specified fadeout time
const float t = diff / m_fadeOutTime;
// Set the style to use our custom shader and set the t uniform
style.setFillProgram(m_shader);
style.setFillShaderUniform("time", t);
// Call the base implementation to perform the filtering
PostProcessFilter::filter(rc, ctx, style);
}

Here the style parameter is used for the filtering so we need to pass in the shader program and all uniforms. We calculate the variable t as a floating point value that specifies the ratio of 'colorness' or color saturation, more specifically the weight factor when performing linear interpolation between the luminance of a pixel and the original color of the pixel. The value 0.0 means full color and 1.0 means completely black-and-white. Note that the style already has the source texture attached with the name "tex", but the texture can also be manually retrieved from the ctx.texture() method.

In the last step we call the base implementation PostProcessFilter::filter. This will render a context sized quad using the specified style. The filter function is called by the render thread once for every area in the screen configuration.

In the fragment shader we first specify the uniform values we are using:

uniform sampler2D tex;
uniform float time;

In the main body of the shader we first retrieve the original color value of the pixel from the texture sampler tex:

vec4 real_color = color * texture(tex, fs_vertex_uv);

We then calculate the luma of the pixel:

float luma = dot(real_color.rgb, vec3(.2126, .7152, .0722));
// Use luma as color
vec4 luma_color = vec4(luma, luma, luma, real_color.a);

Luma represents the achromatic element, or in other words the brightness, of an image. By calculating the luma value for each pixel in the image and using the luma value in the red, green and blue channels we can effectively convert the color of an image to a black-and-white version. The formula used in converting the color to luma values is Y' = 0.2126 R' + 0.7152 G' + 0.0722 B' and is specified in ITU-R Recommendation BT. 709.

Finally, we use the ratio we calculated previously to blend the color image and the black-and-white image:

float t = clamp(time, 0.0, 1.0);
frag_color = mix(real_color, luma_color, t);

In the main application we still need to tell the application to use our black-and-white filter and to reset the timestamp that defines the blending factor of the filter.

For implementing the reset function we use the built-in messaging system and define a eventProcess function that sets the timestamp to the near future whenever it recieves the "reset" message:

void BlackWhiteFilter::eventProcess(const QByteArray & messageId,
{
if(messageId == "reset") {
// Set the timestamp for when the filter should reach full color
Radiant::TimeStamp::createSeconds(m_fadeInTime.asFloat());
} else {
// Process default messages
PostProcessFilter::eventProcess(messageId, data);
}
}

For actually using the filter we need to create an instance of the class and tell the application to use it. New filters can be added at any time after the application has been initialized:

auto filter = std::make_shared<Examples::BlackWhiteFilter>();
app.addPostProcessFilter(filter);

For resetting the timestamp of the filter we add an event listener to each widget that is created in the application and setting the filter as the receiving node:

w->eventAddListener("interaction-begin", "reset", filter.get());

This will send a "reset" message to the filter every time any of the widgets is interacted with.

The rest of the main function is not explained here because the same code is used in the HelloImages example and is discussed in more detail there. For reference the main function is fully included below:

/* Copyright (C) 2007-2013 Multi Touch Oy, Finland, http://www.multitaction.com
*
* This file is part of MultiTouch Cornerstone.
*
* All rights reserved. You may use this file only for purposes for which you
* have a specific, written permission from Multi Touch Oy.
*
*/
#include "BlackWhiteFilter.hpp"
#include <MultiWidgets/Application.hpp>
#include <MultiWidgets/ImageWidget.hpp>
#include <MultiWidgets/StayInsideParentOperator.hpp>
#include <Radiant/Directory.hpp>
int main(int argc, char ** argv)
{
if(!app.init(argc, argv))
return 1;
auto filter = std::make_shared<Examples::BlackWhiteFilter>();
app.addPostProcessFilter(filter);
Valuable::AttributeString dirpath(&app, "dir", "Images");
Valuable::AttributeInt maxImages(&app, "max-images", -1);
Radiant::Directory directory(dirpath, "dds,jpeg,jpg,png");
// Check that there are images to load
if(!directory.count()) {
Radiant::error("There are no image files in directory \"%s\"\n"
"Please use --dir option to specify directory",
dirpath->toUtf8().data());
return 0;
}
int max = directory.count();
if(maxImages >= 0) max = Nimble::Math::Min(max, *maxImages);
float imagesize = app.mainLayer()->size().minimum() * 0.25f;
float imagestep = app.mainLayer()->size().minimum() * 0.50f / max;
// Create an image widget for each image file
for(int i = 0; i < max; i++) {
// Create an image widget:
MultiWidgets::ImageWidgetPtr w =
MultiWidgets::create<MultiWidgets::ImageWidget>();
w->onHeaderReady<MultiWidgets::ImageWidget>([=,&app] (MultiWidgets::ImageWidgetPtr img) {
img->resizeToFit(Nimble::SizeF(imagesize, imagesize));
app.mainLayer()->addChild(w);
});
w->onError<MultiWidgets::ImageWidget>([=] (MultiWidgets::ImageWidgetPtr img) {
img->removeFromParent();
});
w->eventAddListener("interaction-begin", "reset", filter.get());
w->setLocation(Nimble::Vector2(i * imagestep, i * imagestep));
w->setBorderStyle(Stylish::Border::STYLE_SOLID);
w->setBorderWidth(10);
w->addOperator(std::make_shared<MultiWidgets::StayInsideParentOperator>());
// Launch load
w->load(directory.fileNameWithPath(i));
}
// Run the application:
return app.run();
}